ประเภทคำสั่งซื้อขายในการเทรดแบบอัลกอริทึม: จาก Limit แบบไล่ราคาไปจนถึง Virtual Orders
เมื่อผู้เริ่มต้นเปิดหน้าจอเทรด พวกเขาเห็นเพียงปุ่ม "ซื้อ" และ "ขาย" แต่เมื่อนักเทรดแบบอัลกอริทึมเปิด codebase พวกเขาเจอคำสั่งซื้อขายยี่สิบเจ็ดประเภท, สามระดับ abstraction, และ edge case กองโตที่ทำให้อยากปิดแล็ปท็อปแล้วไปขายผักที่ตลาดแทน แต่น่าเสียดายที่การขายผักไม่เปิดโอกาสให้คุณทำ funding rate arbitrage ตอน 3:59 UTC — ดังนั้นมาเริ่มกันเลย
ในบทความนี้ เราจะพาคุณเดินทางตั้งแต่คำสั่งพื้นฐานบนตลาดไปจนถึงโครงสร้าง synthetic เสมือนที่มีอยู่แค่ในระบบของคุณเท่านั้น และไม่ปรากฏใน order book เลย เตรียมพบกับ TypeScript, Python, ความเจ็บปวดบ้าง และแสงสว่างในปลายอุโมงค์
1. คำสั่งมาตรฐานบนตลาด: รากฐานที่ข้ามไม่ได้
 การจำแนกประเภทคำสั่งมาตรฐาน: จาก market ไปจนถึง iceberg
ก่อนจะสร้างสิ่งที่ซับซ้อน เราต้องแน่ใจว่าเข้าใจ building blocks พื้นฐานอย่างถ่องแท้ ไม่น่าแปลกใจที่หลายคนสับสนระหว่าง stop-limit กับ stop-market แล้วสงสัยว่าทำไม stop "ไม่ทำงาน" (spoiler: มันทำงานแล้ว แต่ limit order ไม่ถูก fill เพราะ slippage)
Market order
ประเภทที่ง่ายที่สุดและในขณะเดียวกันก็อันตรายที่สุด คุณบอกตลาดว่า: "ซื้อ/ขายตอนนี้เลย ราคาอะไรก็ได้ที่มี" ตลาดจะดึง liquidity จาก order book เริ่มจากราคาที่ดีที่สุด หากปริมาณที่ระดับราคาดีที่สุดไม่พอ — ก็จะไถลไปต่อ
ควรใช้เมื่อ: ออกจากสถานะอย่างเร่งด่วน, ดำเนินการตามสัญญาณที่ความเร็วสำคัญกว่าราคา
ข้อควรระวัง: ในตลาดที่เบาบาง market order ซื้อ 100 BTC อาจเขยื้อนราคาได้หลายเปอร์เซ็นต์ การ backtest ที่จำลอง market orders โดยไม่คิดเรื่อง impact ถือว่าเป็นแค่จินตนาการล้วนๆ
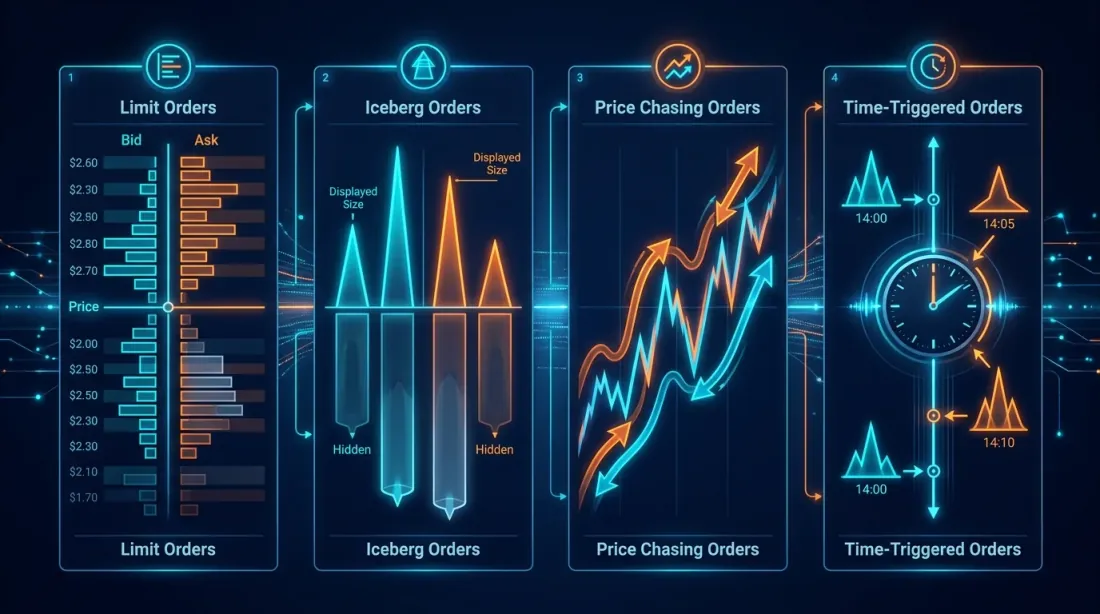
Limit order
คุณระบุราคาที่แน่นอน คำสั่งจะเข้าไปใน order book และรอจนกว่าจะมีคนยอมรับราคาของคุณ หาก limit bid order มีราคาสูงกว่าตลาดปัจจุบัน — จะถูก fill ทันที (เหมือน market order แต่มีราคาสูงสุดที่รับประกันได้)
ประเด็นสำคัญ: limit order ไม่รับประกันการ execution ราคาอาจถึงระดับของคุณแล้วกลับตัว ทิ้งคุณไว้ในคิว (อ่านเพิ่มเติมในบทความของเราเรื่อง ตำแหน่งในคิว)
Stop-market และ Stop-limit
นี่คือจุดที่ความสับสนเริ่มต้น ทั้งสองประเภทเป็นคำสั่ง "นอนหลับ" ที่ถูกเปิดใช้เมื่อถึงราคา trigger (stop price) แต่:
- Stop-market: เมื่อ trigger จะแปลงเป็น market order รับประกันการ execution แต่ไม่รับประกันราคา
- Stop-limit: เมื่อ trigger จะแปลงเป็น limit order รับประกันราคา (ไม่แย่กว่าที่ระบุ) แต่ไม่รับประกันการ execution
ในตลาด crypto ที่ผันผวน stop-limit อาจ "พลาด" — ราคาทะลุ stop แล้ว limit order ถูกวาง แต่ตลาดบินล่วงหน้าไปแล้ว คุณเหลือแค่ limit order ที่ยังไม่ fill และขาดทุนที่เพิ่มขึ้น นั่นคือเหตุผลที่ stop-market นิยมใช้เป็น stop-loss มากกว่า
Trailing stop
Stop ที่ "ตาม" ราคาในระยะที่กำหนด ราคาขึ้น — stop ขึ้นตาม ราคาลง — stop คงที่ มีประโยชน์สำหรับการปกป้องกำไรในกลยุทธ์ที่ตามเทรนด์
การรองรับของตลาด: ไม่ใช่ทุกตลาดที่รองรับ trailing stop แบบ native นักเทรดแบบอัลกอริทึมมักสร้างมันในโค้ด — วิธีนี้ให้ control มากกว่าเรื่องพารามิเตอร์ (callback rate, activation price, step size)
Iceberg order
คำสั่งที่แสดงเพียงส่วนหนึ่งของปริมาณรวมใน order book คุณต้องการซื้อ 1,000 BTC แต่แสดงแค่ 10 ใน book เมื่อ 10 แรก fill — 10 ต่อไปจะปรากฏ
เหตุผล: เพื่อซ่อนเจตนาจริงจากตลาด คำสั่งขนาดใหญ่ใน book บอกสัญญาณทุกคนว่า "มีคนใหญ่ต้องการซื้อ/ขาย" ในการตอบสนอง อัลกอริทึม HFT จะเริ่ม front-running และราคาเคลื่อนออกจากคุณ
ข้อควรระวัง: ในตลาด crypto หลายแห่ง iceberg orders ไม่ได้รับการรองรับ หรือตรวจพบได้ง่ายจากรูปแบบ volume ที่เหมือนกัน อัลกอริทึมขั้นสูงจะ randomize ขนาดส่วนที่มองเห็น
พารามิเตอร์ Time-in-force: GTC, GTD, IOC, FOK
สิ่งเหล่านี้ไม่ใช่ประเภทคำสั่งแยกต่างหาก แต่เป็นพารามิเตอร์ time-in-force — ระยะเวลาที่คำสั่งมีชีวิต:
| พารามิเตอร์ | ชื่อเต็ม | พฤติกรรม |
|---|---|---|
| GTC | Good Till Cancelled | มีชีวิตจนกว่าจะถูกยกเลิก มาตรฐานค่าเริ่มต้น |
| GTD | Good Till Date | มีชีวิตจนถึงวันที่/เวลาที่ระบุ |
| IOC | Immediate or Cancel | execute ทันที (เต็มหรือบางส่วน) ส่วนที่เหลือถูกยกเลิก |
| FOK | Fill or Kill | execute เฉพาะ เมื่อ fill ได้ครบและทันที ถ้าไม่ได้ — ยกเลิกทั้งหมด |
IOC กับ FOK: ความแตกต่างสำคัญมาก IOC อาจ fill บางส่วน — คุณต้องการซื้อ 100 BTC ได้มา 3 ส่วนที่เหลือถูกยกเลิก FOK คือ 100 หรือไม่ได้เลย
Post-only (Maker-only)
คำสั่งที่รับประกันว่าจะเข้า order book ในฐานะ maker และไม่เคย execute ในฐานะ taker หากเวลาที่วางคำสั่งราคาจะทำให้เกิดการ execute ทันที — ตลาดจะปฏิเสธ (หรือปรับราคา ขึ้นอยู่กับตลาด)
เหตุผล: ค่าธรรมเนียม maker มักถูกกว่า taker (บน Binance — 0.02% กับ 0.04% สำหรับระดับ VIP) สำหรับ market maker ที่วางคำสั่งหลายพันรายการต่อวัน ความต่างของค่าธรรมเนียมคือความต่างระหว่างกำไรและขาดทุน
2. TWAP และ VWAP: สถาบันซ่อนช้างใน Order Book อย่างไร
เมื่อ hedge fund ต้องการซื้อสถานะมูลค่า $50M พวกเขาไม่วาง market order เดียว พวกเขาใช้อัลกอริทึมการ execution — อัลกอริทึมที่แบ่งคำสั่งขนาดใหญ่เป็นหลายคำสั่งเล็กๆ และ execute ตามเวลา เพื่อลด market impact ให้น้อยที่สุด
TWAP (Time-Weighted Average Price)
แนวคิดง่ายมาก: แบ่งปริมาณรวมออกเป็นส่วนเท่าๆ กัน และ execute ในช่วงเวลาเท่าๆ กัน
import asyncio
from datetime import datetime, timedelta

class TWAPExecutor:
    """
    TWAP executor: splits a large order into equal parts
    and executes them at equal time intervals.
    """
    def __init__(self, exchange, symbol: str, side: str,
                 total_qty: float, duration_minutes: int, num_slices: int):
        self.exchange = exchange
        self.symbol = symbol
        self.side = side
        self.total_qty = total_qty
        self.slice_qty = total_qty / num_slices
        self.interval = (duration_minutes * 60) / num_slices
        self.num_slices = num_slices
        self.executed_qty = 0.0
        self.fills: list[dict] = []

    async def execute(self):
        for i in range(self.num_slices):
            remaining = self.total_qty - self.executed_qty
            qty = min(self.slice_qty, remaining)
            if qty <= 0:
                break

            try:
                order = await self.exchange.create_order(
                    symbol=self.symbol,
                    type="market",
                    side=self.side,
                    amount=qty,
                )
                self.executed_qty += float(order["filled"])
                self.fills.append(order)
                print(f"[TWAP] slice {i+1}/{self.num_slices}: "
                      f"filled {order['filled']} @ {order['average']}")
            except Exception as e:
                print(f"[TWAP] slice {i+1} failed: {e}")

            if i < self.num_slices - 1:
                await asyncio.sleep(self.interval)

        avg_price = (
            sum(f["cost"] for f in self.fills) /
            sum(f["filled"] for f in self.fills)
        ) if self.fills else 0
        print(f"[TWAP] done: {self.executed_qty}/{self.total_qty} "
              f"avg price: {avg_price:.2f}")
VWAP (Volume-Weighted Average Price)
VWAP ฉลาดกว่า: โดยคำนึงถึง volume profile การเทรดทั่วไป หาก 30% ของ volume ต่อวันมักจะเทรดระหว่าง 9:00 ถึง 10:00 VWAP จะ execute 30% ของคำสั่งในช่วงเวลานั้น เป้าหมายคือให้ราคา execution เฉลี่ยใกล้เคียงกับ VWAP ของตลาดมากที่สุด
class VWAPExecutor:
    """
    VWAP executor: distributes volume proportionally
    to the historical volume profile.
    """
    def __init__(self, exchange, symbol: str, side: str,
                 total_qty: float, volume_profile: list[float]):
        self.exchange = exchange
        self.symbol = symbol
        self.side = side
        self.total_qty = total_qty
        total_weight = sum(volume_profile)
        self.weights = [w / total_weight for w in volume_profile]

    async def execute(self, interval_seconds: float = 60.0):
        executed = 0.0
        for i, weight in enumerate(self.weights):
            qty = self.total_qty * weight
            remaining = self.total_qty - executed
            qty = min(qty, remaining)

            if qty <= 0:
                break

            order = await self.exchange.create_order(
                symbol=self.symbol,
                type="market",
                side=self.side,
                amount=qty,
            )
            executed += float(order["filled"])
            print(f"[VWAP] period {i+1}: weight={weight:.2%}, "
                  f"filled={order['filled']} @ {order['average']}")

            await asyncio.sleep(interval_seconds)
ความแตกต่างระหว่าง TWAP กับ VWAP: TWAP ง่ายกว่าและคาดเดาได้มากกว่า VWAP ให้ราคาเฉลี่ยที่ดีกว่า แต่ต้องการ volume profile ที่เชื่อถือได้ ในตลาด crypto ที่ volume อาจเป็น wash-traded การสร้าง VWAP profile ต้องทำอย่างระมัดระวัง
3. Limit แบบไล่ราคา: เมื่อคำสั่งของคุณรู้จักไล่ตามราคา
 Chasing limit: คำสั่งไล่ตามราคาที่เคลื่อนไหวด้วยความก้าวร้าวที่ตั้งค่าได้
ตอนนี้เรื่องน่าสนใจจริงๆ เริ่มแล้ว limit order มาตรฐานคือ entity แบบ passive: มันนั่งอยู่ใน order book และรอ ถ้าราคาเคลื่อน — คำสั่งก็ยังไม่ fill สำหรับนักเทรดแบบอัลกอริทึม สิ่งนี้มักยอมรับไม่ได้: สัญญาณ entry ยิงแล้ว แต่ position ยังไม่เปิด เพราะตลาดเคลื่อน 0.1%
Chasing limit order คือ programmatic wrapper รอบ limit order ที่:
- วาง limit order ที่ราคา best ปัจจุบัน (หรือมี offset เล็กน้อย)
- ตรวจสอบราคาผ่าน WebSocket
- หากราคาเคลื่อนออกจากคำสั่ง — ยกเลิกและแทนที่ใกล้ราคาปัจจุบันมากขึ้น
- ทำซ้ำจนกว่าคำสั่งจะ fill หรือเกินระยะเบี่ยงเบนที่อนุญาต
พารามิเตอร์หลัก
- chase_interval_ms — ความถี่ในการตรวจสอบและแทนที่คำสั่ง 100ms — ก้าวร้าว, 1000ms — ผ่อนคลาย
- max_chase_distance — ระยะเบี่ยงเบนสูงสุดจากราคาเริ่มต้นก่อนที่คำสั่งจะถูกยกเลิก ป้องกันการไล่ตามตลาดที่วิ่งหนี
- aggression_level — ความใกล้ชิดกับราคาตลาดในการวาง limit order
0— ที่ best bid/ask (passive),1— ข้าม spread (ก้าวร้าว, เหมือน taker) - chase_on_partial — จะไล่ต่อหรือไม่หากคำสั่ง fill บางส่วน
การ implement ด้วย TypeScript
interface ChasingOrderParams {
  symbol: string;
  side: "buy" | "sell";
  totalQty: number;
  /** 0 = passive (at best bid/ask), 1 = cross spread */
  aggression: number;
  /** max price deviation from initial price */
  maxChaseDistance: number;
  /** how often to re-evaluate, ms */
  chaseIntervalMs: number;
  /** stop chasing after this many ms */
  timeoutMs: number;
}

class ChasingLimitOrder {
  private currentOrderId: string | null = null;
  private filledQty = 0;
  private initialPrice: number | null = null;
  private startTime = Date.now();

  constructor(
    private exchange: any, // ccxt exchange instance
    private params: ChasingOrderParams
  ) {}

  async execute(): Promise<{ filledQty: number; avgPrice: number }> {
    const fills: Array<{ qty: number; price: number }> = [];

    while (this.filledQty < this.params.totalQty) {
      // Timeout
      if (Date.now() - this.startTime > this.params.timeoutMs) {
        console.log("[CHASE] timeout reached, cancelling");
        await this.cancelCurrent();
        break;
      }

      // Get current order book
      const book = await this.exchange.fetchOrderBook(
        this.params.symbol, 5
      );
      const bestBid = book.bids[0][0];
      const bestAsk = book.asks[0][0];
      const spread = bestAsk - bestBid;

      // Calculate target price
      let targetPrice: number;
      if (this.params.side === "buy") {
        targetPrice = bestBid + spread * this.params.aggression;
      } else {
        targetPrice = bestAsk - spread * this.params.aggression;
      }

      // Remember the initial price
      if (this.initialPrice === null) {
        this.initialPrice = targetPrice;
      }

      // Check max chase distance
      const deviation = Math.abs(targetPrice - this.initialPrice);
      if (deviation > this.params.maxChaseDistance) {
        console.log(
          `[CHASE] max deviation exceeded: ${deviation.toFixed(4)} > ` +
          `${this.params.maxChaseDistance}`
        );
        await this.cancelCurrent();
        break;
      }

      // Check current order
      if (this.currentOrderId) {
        const order = await this.exchange.fetchOrder(
          this.currentOrderId, this.params.symbol
        );

        if (order.status === "closed") {
          fills.push({ qty: order.filled, price: order.average });
          this.filledQty += order.filled;
          this.currentOrderId = null;
          continue;
        }

        // Update filledQty for partial fills
        if (order.filled > 0) {
          const newFilled = order.filled - (
            fills.reduce((s, f) => s + f.qty, 0) - this.filledQty
          );
          // Order is in place — do we need to reprice?
        }

        const currentPrice = parseFloat(order.price);
        const priceDiff = Math.abs(currentPrice - targetPrice);
        const tickSize = spread * 0.1 || 0.01;

        if (priceDiff > tickSize) {
          // Price moved — reprice
          console.log(
            `[CHASE] repricing: ${currentPrice} -> ` +
            `${targetPrice.toFixed(4)}`
          );
          await this.cancelCurrent();
        } else {
          // Order is at the right price — wait
          await this.sleep(this.params.chaseIntervalMs);
          continue;
        }
      }

      // Place new order
      const remainingQty = this.params.totalQty - this.filledQty;
      const order = await this.exchange.createLimitOrder(
        this.params.symbol,
        this.params.side,
        remainingQty,
        targetPrice
      );
      this.currentOrderId = order.id;
      console.log(
        `[CHASE] placed ${this.params.side} ${remainingQty} ` +
        `@ ${targetPrice.toFixed(4)}`
      );

      await this.sleep(this.params.chaseIntervalMs);
    }

    const totalCost = fills.reduce((s, f) => s + f.qty * f.price, 0);
    const avgPrice = this.filledQty > 0 ? totalCost / this.filledQty : 0;
    return { filledQty: this.filledQty, avgPrice };
  }

  private async cancelCurrent(): Promise<void> {
    if (this.currentOrderId) {
      try {
        await this.exchange.cancelOrder(
          this.currentOrderId, this.params.symbol
        );
      } catch { /* order already filled or cancelled */ }
      this.currentOrderId = null;
    }
  }

  private sleep(ms: number): Promise<void> {
    return new Promise((resolve) => setTimeout(resolve, ms));
  }
}
เมื่อ Chasing ส่งผลเสีย
Chasing เป็นเครื่องมือทรงพลัง แต่ง่ายที่จะกลายเป็นเครื่องสร้างขาดทุน:
- Cancel/replace spam. การยกเลิกและแทนที่ทุกครั้งคือภาระบน API ตลาดจำกัด rate ของ request และการ chasing ที่ก้าวร้าวอาจทำให้ API key ของคุณถูกแบน
- Adverse selection. หากราคากำลังวิ่งหนีจากคุณ — ตลาดอาจรู้บางอย่างที่คุณไม่รู้ การไล่ราคาในสถานการณ์นี้หมายถึงการซื้อที่จุดสูงสุด
- การเปลี่ยนจาก Maker เป็น Taker. ด้วยความก้าวร้าวสูงคุณจ่ายค่าธรรมเนียม taker อยู่แล้ว แต่มีความล่าช้า (cancel + คำสั่งใหม่) บางครั้งง่ายกว่าที่จะวาง market order เลย
4. คำสั่งตามเวลา: ความแม่นยำระดับมิลลิวินาที
มีสถานการณ์ที่คุณต้องการ execute คำสั่งไม่ใช่ "ที่ราคา X" แต่ "ณ เวลา T" ฟังดูแปลก? จริงๆ แล้วมันเป็นทั้งประเภทกลยุทธ์
กรณีใช้งาน
Funding rate arbitrage. บน perpetual futures funding จะถูกจ่ายทุก 8 ชั่วโมง (00:00, 08:00, 16:00 UTC บน Binance) หาก funding rate = +0.1% คุณต้อง short ณ เวลาการชำระ กลยุทธ์: เปิด short ไม่กี่วินาทีก่อนชำระ รับ funding ปิดสถานะ การจับเวลาสำคัญมาก — ความล่าช้าหนึ่งวินาทีหมายถึงพลาด funding
การเปิด/ปิด session. ในตลาดดั้งเดิมและ crypto derivatives บางส่วน มี session คงที่ การประมูลเปิด (NYSE, CME) คือเวลาที่ liquidity อยู่ที่จุดสูงสุด การวางคำสั่ง 100ms ก่อนการประมูลคือ edge
การ execute ตามข่าว. ข้อมูลเงินเฟ้อเผยแพร่ในเวลาที่กำหนด อัลกอริทึมวิเคราะห์ตัวเลขจาก news feed และวางคำสั่งภายใน 50ms ที่นี่ การ execute ตามเวลาผสมกับ event-driven logic
การ implement
class TimeBasedOrder {
  constructor(
    private exchange: any,
    private symbol: string,
    private side: "buy" | "sell",
    private qty: number,
    private orderType: "market" | "limit",
    private limitPrice?: number
  ) {}

  /**
   * Schedule execution at a precise time.
   * Uses a busy-wait loop for maximum precision.
   */
  async executeAt(targetTime: Date): Promise<any> {
    const targetMs = targetTime.getTime();

    // Phase 1: coarse wait (sleep)
    const coarseWait = targetMs - Date.now() - 500; // wake up 500ms early
    if (coarseWait > 0) {
      console.log(
        `[TIME-ORDER] sleeping for ${(coarseWait / 1000).toFixed(1)}s`
      );
      await new Promise((r) => setTimeout(r, coarseWait));
    }

    // Phase 2: precise wait (busy-wait)
    while (Date.now() < targetMs) {
      // spin — burns CPU, but achieves ~1ms precision
    }

    // Phase 3: execution
    const sendTime = Date.now();
    const order = await this.exchange.createOrder(
      this.symbol,
      this.orderType,
      this.side,
      this.qty,
      this.limitPrice
    );

    console.log(
      `[TIME-ORDER] executed at ${new Date(sendTime).toISOString()}, ` +
      `target was ${targetTime.toISOString()}, ` +
      `delta: ${sendTime - targetMs}ms`
    );

    return order;
  }
}

// Example: place an order exactly at 00:00:00 UTC (funding settlement)
const executor = new TimeBasedOrder(exchange, "BTC/USDT", "sell", 0.1, "market");
const target = new Date("2026-03-24T00:00:00.000Z");
await executor.executeAt(target);
ข้อควรระวังสำคัญ: ความแม่นยำของคำสั่งตามเวลาไม่ถูกจำกัดโดยโค้ดของคุณ แต่โดย network latency ไปยังตลาด หาก ping ไปยัง API ของคุณคือ 50ms แม้ busy-wait ที่สมบูรณ์แบบก็จะมี delta 50ms สำหรับ HFT จริงจัง จะใช้ co-location — เซิร์ฟเวอร์ตั้งอยู่ติดกับ matching engine ของตลาดจริงๆ
5. Virtual/Synthetic Orders: ผู้ล่องหนในระบบของคุณ
 Virtual orders: คำสั่งมีอยู่แค่ในหน่วยความจำของ bot จนกว่า trigger จะยิง
นี่อาจเป็นเครื่องมือที่ถูกมองข้ามมากที่สุดในคลังอาวุธของนักเทรดแบบอัลกอริทึม virtual order (หรือที่รู้จักว่า synthetic order) คือคำสั่งที่มีอยู่ เฉพาะในระบบของคุณ มันจะไม่ถูกส่งไปยังตลาดจนกว่าจะตรงตามเงื่อนไข trigger (โดยทั่วไป — ราคาถึงระดับหนึ่ง)
มันทำงานอย่างไร
- อัลกอริทึมของคุณตัดสินใจ: "ฉันต้องการซื้อ BTC ที่ $40,000"
- แทนที่จะส่ง limit order ไปยังตลาด มันสร้าง virtual order ในหน่วยความจำ
- Subscribe ไปยัง price stream ของ WebSocket
- เมื่อ bid/ask ถึง $40,000 — ส่ง market หรือ limit order จริงไปยังตลาด
ทำไม Virtual Orders จึงสำคัญ
ไม่มีการรั่วไหลของข้อมูล. คำสั่งของคุณล่องหนใน order book ไม่มีใคร — ไม่ว่าจะเป็นนักเทรดคนอื่น, อัลกอริทึม HFT, หรือแม้แต่ตลาดเอง — รู้เจตนาของคุณจนถึงเวลา execution สิ่งนี้เปลี่ยนสมดุลอำนาจอย่างพื้นฐาน
การป้องกัน Front-running. ในตลาด crypto โดยเฉพาะที่โปร่งใสน้อยกว่า มีความสงสัยที่สมเหตุสมผลว่าข้อมูลเกี่ยวกับ limit orders ขนาดใหญ่อาจถูกใช้สำหรับ front-running (มีงานศึกษาเรื่องนี้ด้วย) Virtual orders ขจัดความเสี่ยงนี้
Grid bots. grid bot คลาสสิกวาง grid ของคำสั่ง 50-200 รายการที่ระดับราคาต่างๆ หากส่งทั้งหมดไปยังตลาด — นั่นคือ 200 คำสั่งใน book ที่: (a) มองเห็นได้โดยทุกคน, (b) ใช้ขีดจำกัดคำสั่งบนตลาด (โดยทั่วไป 200-300 คำสั่งเปิดต่อบัญชี), (c) หากราคาเคลื่อนอย่างรวดเร็ว ทั้งหมดจะ fill และคุณจบลงด้วยสถานะขนาดใหญ่ Virtual orders แก้ปัญหาทั้งสามนี้
การซื้อตอนราคาร่วง. กลยุทธ์: วาง virtual buy orders ที่ระดับ -5%, -10%, -15% ต่ำกว่าราคาปัจจุบัน หากตลาดลง — คำสั่งจะ trigger ทีละน้อย หากไม่ลง — คุณไม่เสี่ยงอะไรและไม่ใช้ slot คำสั่งบนตลาด
การ implement ด้วย TypeScript
interface VirtualOrder {
  id: string;
  symbol: string;
  side: "buy" | "sell";
  triggerPrice: number;
  qty: number;
  /** Order type sent to the exchange upon triggering */
  executionType: "market" | "limit";
  /** For limit: offset from trigger price */
  limitOffset?: number;
  status: "pending" | "triggered" | "filled" | "failed";
}

class VirtualOrderManager {
  private orders: Map<string, VirtualOrder> = new Map();
  private orderCounter = 0;

  constructor(private exchange: any) {}

  /**
   * Create a virtual order. Nothing is sent to the exchange.
   */
  addOrder(params: Omit<VirtualOrder, "id" | "status">): string {
    const id = `virt_${++this.orderCounter}`;
    this.orders.set(id, { ...params, id, status: "pending" });
    console.log(
      `[VIRTUAL] created ${params.side} ${params.qty} ` +
      `${params.symbol} @ trigger ${params.triggerPrice}`
    );
    return id;
  }

  /**
   * Called on every price tick (from WebSocket).
   */
  async onPriceUpdate(
    symbol: string, bestBid: number, bestAsk: number
  ): Promise<void> {
    for (const [id, order] of this.orders) {
      if (order.symbol !== symbol || order.status !== "pending") continue;

      const triggered =
        (order.side === "buy" && bestAsk <= order.triggerPrice) ||
        (order.side === "sell" && bestBid >= order.triggerPrice);

      if (!triggered) continue;

      order.status = "triggered";
      console.log(
        `[VIRTUAL] ${id} triggered! bid=${bestBid} ask=${bestAsk}`
      );

      try {
        let realOrder: any;

        if (order.executionType === "market") {
          realOrder = await this.exchange.createMarketOrder(
            order.symbol, order.side, order.qty
          );
        } else {
          const limitPrice = order.side === "buy"
            ? order.triggerPrice + (order.limitOffset ?? 0)
            : order.triggerPrice - (order.limitOffset ?? 0);
          realOrder = await this.exchange.createLimitOrder(
            order.symbol, order.side, order.qty, limitPrice
          );
        }

        order.status = "filled";
        console.log(
          `[VIRTUAL] ${id} filled: ${realOrder.filled} ` +
          `@ ${realOrder.average ?? realOrder.price}`
        );
      } catch (err) {
        order.status = "failed";
        console.error(`[VIRTUAL] ${id} execution failed:`, err);
      }
    }
  }

  /**
   * Get all active virtual orders.
   */
  getPendingOrders(): VirtualOrder[] {
    return [...this.orders.values()].filter(
      (o) => o.status === "pending"
    );
  }

  cancelOrder(id: string): boolean {
    const order = this.orders.get(id);
    if (order && order.status === "pending") {
      this.orders.delete(id);
      return true;
    }
    return false;
  }
}

// --- Example: Grid bot with virtual orders ---

async function gridBot(exchange: any) {
  const manager = new VirtualOrderManager(exchange);
  const currentPrice = 42000;
  const gridStep = 200;      // grid step
  const gridLevels = 20;     // levels in each direction
  const qtyPerLevel = 0.01;  // BTC per level

  // Create virtual grid
  for (let i = 1; i <= gridLevels; i++) {
    // Buy orders below current price
    manager.addOrder({
      symbol: "BTC/USDT",
      side: "buy",
      triggerPrice: currentPrice - gridStep * i,
      qty: qtyPerLevel,
      executionType: "limit",
      limitOffset: 1,  // limit price = trigger + 1 USDT
    });

    // Sell orders above current price
    manager.addOrder({
      symbol: "BTC/USDT",
      side: "sell",
      triggerPrice: currentPrice + gridStep * i,
      qty: qtyPerLevel,
      executionType: "limit",
      limitOffset: 1,
    });
  }

  console.log(
    `[GRID] created ${gridLevels * 2} virtual orders, ` +
    `0 on exchange`
  );

  // WebSocket subscription (pseudocode for ccxt.pro)
  while (true) {
    const ticker = await exchange.watchTicker("BTC/USDT");
    await manager.onPriceUpdate(
      "BTC/USDT", ticker.bid, ticker.ask
    );
  }
}
ข้อผิดพลาดของ Virtual Orders
-
Latency gap. ระหว่างเวลาที่คุณเห็นราคาและเวลาที่คำสั่งจริงถึงตลาด มีเวลาผ่านไป บนตลาดที่ผันผวน ราคาอาจบินไปใน 20-100ms นั้น วิธีแก้: ส่ง limit order ที่ก้าวร้าวเล็กน้อย (มี buffer)
-
การพลาด fill. หากราคา "ทะลุ" ระดับของคุณในหนึ่ง tick (flash crash) แล้วกลับตัว — คุณอาจตอบสนองไม่ทัน limit order ธรรมดาที่นั่งอยู่ใน book จะถูก fill; แบบ virtual — ไม่
-
การจัดการ state. Virtual orders อาศัยอยู่ในหน่วยความจำ หาก process crash — orders หาย วิธีแก้: persistent storage (Redis, SQLite, ไฟล์) พร้อม recovery เมื่อ restart
6. Conditional/Smart Orders: การรวมกันของคำสั่ง
เมื่อคำสั่งเดียวไม่พอ นักเทรดจะรวมพวกมันเข้าในโครงสร้าง conditional บางอย่างรองรับ native บนตลาด อื่นๆ implement ด้วยโปรแกรม
OCO (One Cancels Other)
คำสั่งสองรายการเชื่อมกัน: ถ้าอันหนึ่ง execute — อีกอันถูกยกเลิกอัตโนมัติ ตัวอย่างคลาสสิก: คุณอยู่ในสถานะ long และต้องการตั้ง take-profit และ stop-loss ทั้งคู่ ไม่ว่าอันไหน trigger ก่อน — อีกอันต้องถูกยกเลิก
class OCOHandler:
    """
    OCO: when one order fills, the other is cancelled.
    """
    def __init__(self, exchange, symbol: str):
        self.exchange = exchange
        self.symbol = symbol
        self.order_a_id: str | None = None
        self.order_b_id: str | None = None

    async def place(
        self,
        take_profit_price: float,
        stop_loss_price: float,
        qty: float,
    ):
        tp = await self.exchange.create_limit_sell_order(
            self.symbol, qty, take_profit_price
        )
        self.order_a_id = tp["id"]

        sl = await self.exchange.create_order(
            self.symbol, "stop", "sell", qty,
            None, {"stopPrice": stop_loss_price}
        )
        self.order_b_id = sl["id"]

        print(f"[OCO] TP @ {take_profit_price}, SL @ {stop_loss_price}")

    async def monitor(self):
        """Checks statuses and cancels the paired order."""
        while True:
            if self.order_a_id:
                a = await self.exchange.fetch_order(
                    self.order_a_id, self.symbol
                )
                if a["status"] == "closed":
                    print("[OCO] take-profit filled, cancelling stop-loss")
                    await self.exchange.cancel_order(
                        self.order_b_id, self.symbol
                    )
                    break

            if self.order_b_id:
                b = await self.exchange.fetch_order(
                    self.order_b_id, self.symbol
                )
                if b["status"] == "closed":
                    print("[OCO] stop-loss filled, cancelling take-profit")
                    await self.exchange.cancel_order(
                        self.order_a_id, self.symbol
                    )
                    break

            await asyncio.sleep(0.5)
Bracket order
โครงสร้างสามองค์ประกอบ: คำสั่ง entry หลัก + OCO สำหรับออก (take-profit + stop-loss) โดยพื้นฐานแล้ว วงจรชีวิตการเทรดครบถ้วนในการเรียกครั้งเดียว:
- Entry: limit buy order
- Take-profit: limit sell order (สูงกว่า)
- Stop-loss: stop-market sell order (ต่ำกว่า)
เมื่อ entry fill, TP และ SL จะถูกวางอัตโนมัติ เมื่ออันใดอันหนึ่ง fill — อีกอันถูกยกเลิก
If-Then Logic
ตัวเลือกที่ยืดหยุ่นที่สุด — chain ของคำสั่งที่มีเงื่อนไขตามใจชอบ:
rules = [
    {
        "condition": {"symbol": "BTC/USDT", "price_above": 50000},
        "action": {"type": "market_buy", "symbol": "ETH/USDT", "qty": 10},
        "then": [
            {
                "condition": {"symbol": "ETH/USDT", "price_above": 4000},
                "action": {"type": "market_sell", "symbol": "ETH/USDT", "qty": 10},
            },
            {
                "condition": {"symbol": "ETH/USDT", "price_below": 3500},
                "action": {"type": "market_sell", "symbol": "ETH/USDT", "qty": 10},
            },
        ]
    }
]
โครงสร้างเหล่านี้ไม่รองรับ native โดยตลาดใดๆ — มีแค่การ implement ด้วยโปรแกรม นี่คือเหตุผลหนึ่งที่ระบบ algotrading หลีกเลี่ยงไม่ได้ที่จะเติบโตมามีชั้น order management เป็นของตัวเอง
7. Market Makers ใช้ประเภทคำสั่งพิเศษอย่างไร
Market making เป็นจักรวาลในตัวเอง และชุดเครื่องมือคำสั่งก็เข้าคู่กัน งานของ market maker คือการ quote bid และ ask อย่างต่อเนื่อง ทำกำไรจาก spread ในขณะที่ลด adverse selection ให้น้อยที่สุด (สถานการณ์ที่นักเทรดผู้มีข้อมูลมาเทรดกับคุณ)
Post-only ในฐานะสิ่งที่ขาดไม่ได้
สำหรับ market maker post-only ไม่ใช่ตัวเลือก — มันคือข้อกำหนด หากคำสั่งของคุณ execute ในฐานะ taker โดยไม่ตั้งใจ — แทนที่จะได้รับ maker rebate คุณจ่ายค่าธรรมเนียม taker ข้ามหลายพันคำสั่งต่อวัน นั่นคือหายนะ
async def quote(exchange, symbol, mid_price, half_spread, qty):
    bid_price = mid_price - half_spread
    ask_price = mid_price + half_spread

    bid = await exchange.create_order(
        symbol, "limit", "buy", qty, bid_price,
        {"postOnly": True}  # CRITICAL for market makers
    )
    ask = await exchange.create_order(
        symbol, "limit", "sell", qty, ask_price,
        {"postOnly": True}
    )
    return bid, ask
Hidden orders
บนตลาดบางแห่ง (Kraken, Bitfinex) hidden orders มีให้ใช้ — พวกมันไม่ปรากฏใน order book แต่อยู่บนตลาดและเข้าร่วมการ matching การแลกเปลี่ยน: คุณจ่ายค่าธรรมเนียม taker แม้ในฐานะ maker แต่คุณได้ความเป็นนิรนาม
สำหรับ market maker นี่คือเครื่องมือสำหรับการจัดการ inventory: หากสะสมสถานะขนาดใหญ่ คุณสามารถวาง hidden order เพื่อปิดมันโดยไม่เปิดเผยเจตนาต่อตลาด
Pegged orders
คำสั่งที่ยึดกับ best bid/ask บน Coinbase Advanced Trade เช่น คุณสามารถวางคำสั่งที่ติดตาม best bid อัตโนมัติและนั่งอยู่ด้านหน้าของคิวตลอดเวลา นี่คือ chasing order ระดับ native บนตลาด — แต่ยังไม่แพร่หลายทุกที่
การจัดการคำสั่งแบบ Bulk
Market makers มืออาชีพใช้ batch APIs เพื่อยกเลิกและวางคำสั่งหลายสิบรายการพร้อมกันในการ request HTTP เดียว บน Binance คือ batchOrders, บน Bybit — place-batch-order สิ่งนี้ลด latency และภาระของ rate limit
8. ตารางเปรียบเทียบประเภทคำสั่ง
| ประเภทคำสั่ง | รับประกันการ Execute | รับประกันราคา | มองเห็นใน Book | รองรับ Native บนตลาด | ความซับซ้อนในการ Implement |
|---|---|---|---|---|---|
| Market | ใช่ | ไม่ | ไม่ (ทันที) | ใช่ | ไม่มี |
| Limit | ไม่ | ใช่ | ใช่ | ใช่ | ไม่มี |
| Stop-market | ใช่ (หลัง trigger) | ไม่ | ไม่ | ใช่ | ไม่มี |
| Stop-limit | ไม่ | ใช่ | ไม่ (จนกว่า trigger) | ใช่ | ไม่มี |
| Trailing stop | ใช่ (หลัง trigger) | ไม่ | ไม่ | บางส่วน | ต่ำ |
| Iceberg | ไม่ | ใช่ | บางส่วน | บางส่วน | กลาง |
| Post-only | ไม่ | ใช่ | ใช่ | ใช่ | ไม่มี |
| TWAP | ไม่ (ขึ้นกับ slice) | ไม่ | บางส่วน | ไม่ | กลาง |
| VWAP | ไม่ | ไม่ | บางส่วน | ไม่ | สูง |
| Chasing limit | สูงกว่า limit | บางส่วน | ใช่ (คำสั่งปัจจุบัน) | ไม่ | กลาง |
| Time-based | ขึ้นกับประเภท | ขึ้นกับประเภท | ไม่ (จนถึงเวลา T) | ไม่ | ต่ำ |
| Virtual/Synthetic | ต่ำกว่า limit | ขึ้นกับประเภท | ไม่ | ไม่ | กลาง |
| OCO | ใช่ (หนึ่งในสอง) | บางส่วน | ใช่ (ทั้งคู่) | บางส่วน | กลาง |
| Bracket | ใช่ | บางส่วน | ใช่ | หายาก | สูง |
| Hidden | ไม่ | ใช่ | ไม่ | หายาก | ไม่มี |
| Pegged | ไม่ | Dynamic | ใช่ | หายากมาก | สูง (ถ้า programmatic) |
สรุป: คำสั่งในฐานะ Building Block ของกลยุทธ์
ประเภทคำสั่งไม่ใช่แค่ "ปุ่มใน interface" พวกมันคือ primitive พื้นฐานที่ใช้สร้าง execution layer ของระบบการเทรดใดๆ ความต่างระหว่าง "กลยุทธ์ทำกำไรใน backtest" และ "กลยุทธ์ทำกำไรใน production" มักอยู่ที่นี่ — ในวิธีที่คุณส่งคำสั่งไปยังตลาด
บทสรุปเชิงปฏิบัติบางประการ:
- เริ่มด้วยคำสั่งมาตรฐาน ตรวจสอบให้แน่ใจว่าเข้าใจความแตกต่าง (stop-limit กับ stop-market, IOC กับ FOK) ความผิดพลาดส่วนใหญ่เกิดที่นี่
- Virtual orders จำเป็นสำหรับ grid bots. หากวางคำสั่งมากกว่า 50 รายการ — อย่าส่งทั้งหมดไปยังตลาด
- Chasing จำเป็นเมื่ออัตรา fill สำคัญกว่าราคา. แต่ตั้ง max_chase_distance เสมอ — มิฉะนั้นอาจลอยไปไกลมาก
- การ execute ตามเวลา มีเฉพาะกลุ่มแต่ทรงพลังสำหรับ funding arb และกลยุทธ์ event-driven
- ชั้น order management แบบกำหนดเอง หลีกเลี่ยงไม่ได้สำหรับระบบ algotrading จริงจังใดๆ ประเภทคำสั่ง native ของตลาดไม่เพียงพอ
หากคุณกำลังสร้างระบบการเทรดและต้องการไปลึกกว่านี้ — ดูบทความของเราเรื่อง ตำแหน่งคิวใน order book, WebSocket methods ใน CCXT, และ funding rate arbitrage
อ้างอิงและแหล่งข้อมูล
- CCXT Library — ไลบรารีรวมสำหรับทำงานกับตลาด crypto รองรับ 100+ ตลาด
- Binance API Documentation — เอกสารประเภทคำสั่งของ Binance
- Bybit API v5 — เอกสาร Bybit รวมถึง batch orders
- Moallemi, C. & Yuan, K. (2017). The Value of Queue Position in a Limit Order Book. Columbia Business School Research Paper
- Cartea, A., Jaimungal, S., & Penalva, J. (2015). Algorithmic and High-Frequency Trading. Cambridge University Press
- Avellaneda, M. & Stoikov, S. (2008) — High-frequency trading in a limit order book. Quantitative Finance
- Erik Rigtorp — Order Queue Position Estimation — วัสดุเกี่ยวกับการประมาณตำแหน่งคิว
- Trading Technologies (TT) — แพลตฟอร์มมืออาชีพพร้อมประเภทคำสั่งขั้นสูง
ผู้เขียน

Trading-systems engineer
Trading-systems engineer building bots since 2017: cross-exchange arbitrage (connected up to 30 venues), cointegration-based pairs arbitrage across spot and futures, scalping, news and sentiment-driven strategies, trend algorithms, and portfolio management and balancing algorithms. Also builds sub-millisecond order execution, big-data warehouses, backtesting engines, AI agents, and trading interfaces (incl. open-source profitmaker.cc). Stack: JS/TS, Python, Rust/Zig/Go, DevOps, backend, frontend, architecture.
อ่านเพิ่มเติม

T-Bricks (Broadridge): แพลตฟอร์มที่ขับเคลื่อน Prop Firm ทำงานอย่างไร

OneTick: แพลตฟอร์มที่ตลาดหลักทรัพย์ใช้จับ Spoofer และกองทุน Hedge Fund ใช้ล่า Alpha